Python program turtle art! (How to) (blog python)
Python program turtle art!
Hey guys! Today I'm gonna be introducing you to python and turtle art. This is assumed as a beginner thing in python. But I think regardless of your skill level as long as you haven't tried them before you will come out of the article with some new python knowledge. So without future ado let's hop into it.
What well make
So for this blog, we are going to be making some circle art with python turtles. So by the end of this, you should be able to make your own circle art and understand the simple math behind it.
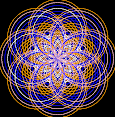
here is a sneak peek at things you will be able to make soon!
but we will just be one drawing! still lots of fun though and using what you learn here you'll be able to make something like that!
(NOTE: code from the video will be in GitHub)
The code
Let's get started with the coding part! At the end of this blog, you should have a script that makes something like this. It won't be exact though because it has random color choices.
Now notice how the drawing is made up of circles this is because we just keep drawing lots of circles at different sizes to make our final drawing!
Cool!, now let's start writing the first few lines! To start off we need to import our libraries. We need the random library to randomly pick a color. We need the turtle library to of course use turtles. And we need the time library to just wait 100 seconds at the end of our code so we can enjoy the drawing we made! So just add this code.

Great! now let create our turtle. we will call it turtle. very creative I know! We should also set a speed to our turtle so it doesn't take all day to draw. We can do this with this code!

Nice, we can now create some variables that will define how big our circle is and how many circles we will draw before sizing down. Plus a list to store our colors. So just add this code!

Now we need to add a nice black background. Not needed but makes it look better in my opinion. We can do this with the .dot turtle command. We also need to pick a starting color. So just add this code.

Great! now let's get into actually drawing. Let's start by adding a for loop that runs 300 times! so 300 circles will be made. So just add this loop.
Now let's make our fist circle! This is a simple 4 step process.
Change our color
make the circle
turn left 45 degrees
minus one from the circle amount
We can do this very easily! For step one we just use the .color command for step 2 we use the .circle command for step 3 we use the .left or .lt command and for 4 we just use simple -= logic.
So just add this code!

Now we could stop there but then the whole thing would be one color and one size. And that's where the circle_amount comes in! Once it hits 0 we know that we need to size down the circles and change colors. Plus reset the circle_amount back to eight. So just add this

Ok, now we just add a time.sleep at the end of the code so we can actually see what we made! Just add this code at the end outside the loop!
Final thoughts
Thanks for reading guys! I hope got a bit of new knowledge or at least some fun out of this blog! if you did you could help me out by dropping a follow on the blog! that would be awesome! And as always if you have any thoughts or questions id be happy to answer them. Thanks for reading and with that keep on creating and exploring and ill be heading off for now!

make sure to leave a comment guys!
ReplyDeleteI really have a sweet spot for turtle art! Great job!
ReplyDeleteSame here! thanks <:
Delete